This card is my second offering for this month as a member of the Craft A Scene Design Team. This month's theme is Use Your favourite Technique - to produce a card that is a scene, but showing us, at the same time, how you love to work. So it is a two part challenge, your own technique but still creating a scene with a background and a foreground.
Before I go any further with this post, I want to make it very clear that the inspiration for this card comes entirely from Barbara Gray from Clarity Stamps, and was from one of her recent blog tutorials. If you want to see what she did, just follow this link http://barbaragrayblog.blogspot.co.uk/2014/02/china-blue-duck.html and you can read exactly what she did.
Mine is slightly different, partly because I did not have all the things she used, I did it on different card, and I am not as talented as Barbara is.
Ingredients
Theuva card (Clarity)
Large moon mask
Low tack masking tape
Speedball brayer
SplodgeAway mat or Claritymat
Adirondack ink pad - Juniper
Adirondack ink pad - Denim
Adirondack ink pad - Pitch Black
Clarity Stamps - Large sapling, small sapling, remountable flying duck
Copy paper

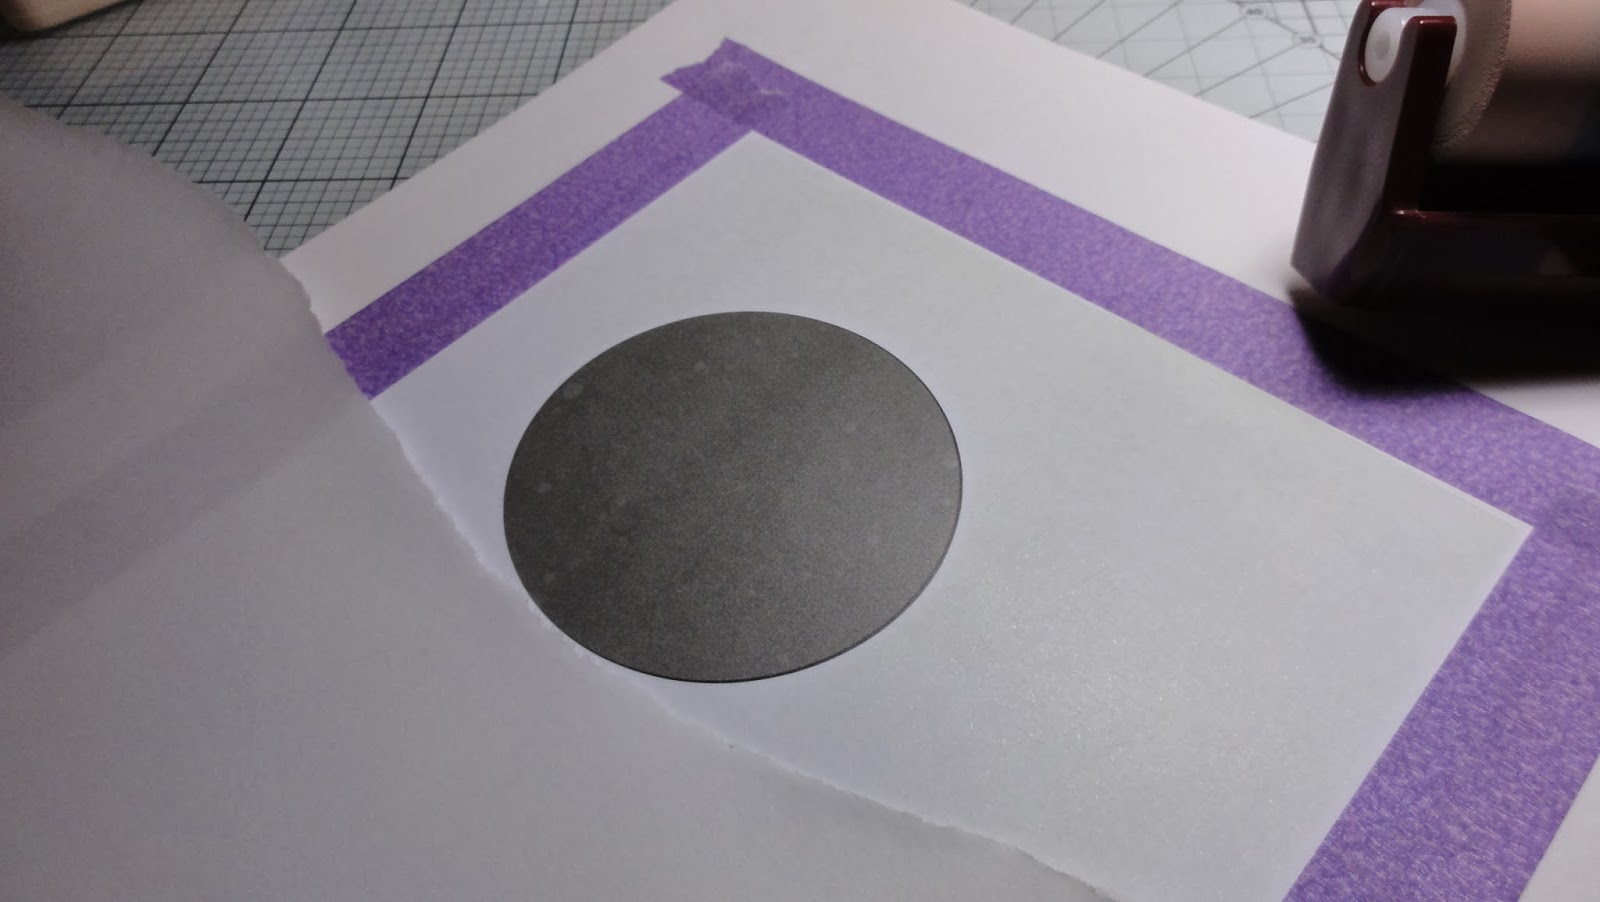
The first thing to do is to attach the Theuva card to a piece of copy paper with the low tack tape. It is a good idea to detack the masking tape further by sticking it to your jumper before using it on your card. Then decide where you want your moon and place your moon mask. If you don't have a ready made mask, cut one out of the sticky end of a post it note.
Then take a piece of cheap copy paper and tear it in half lengthways to form hill shapes.

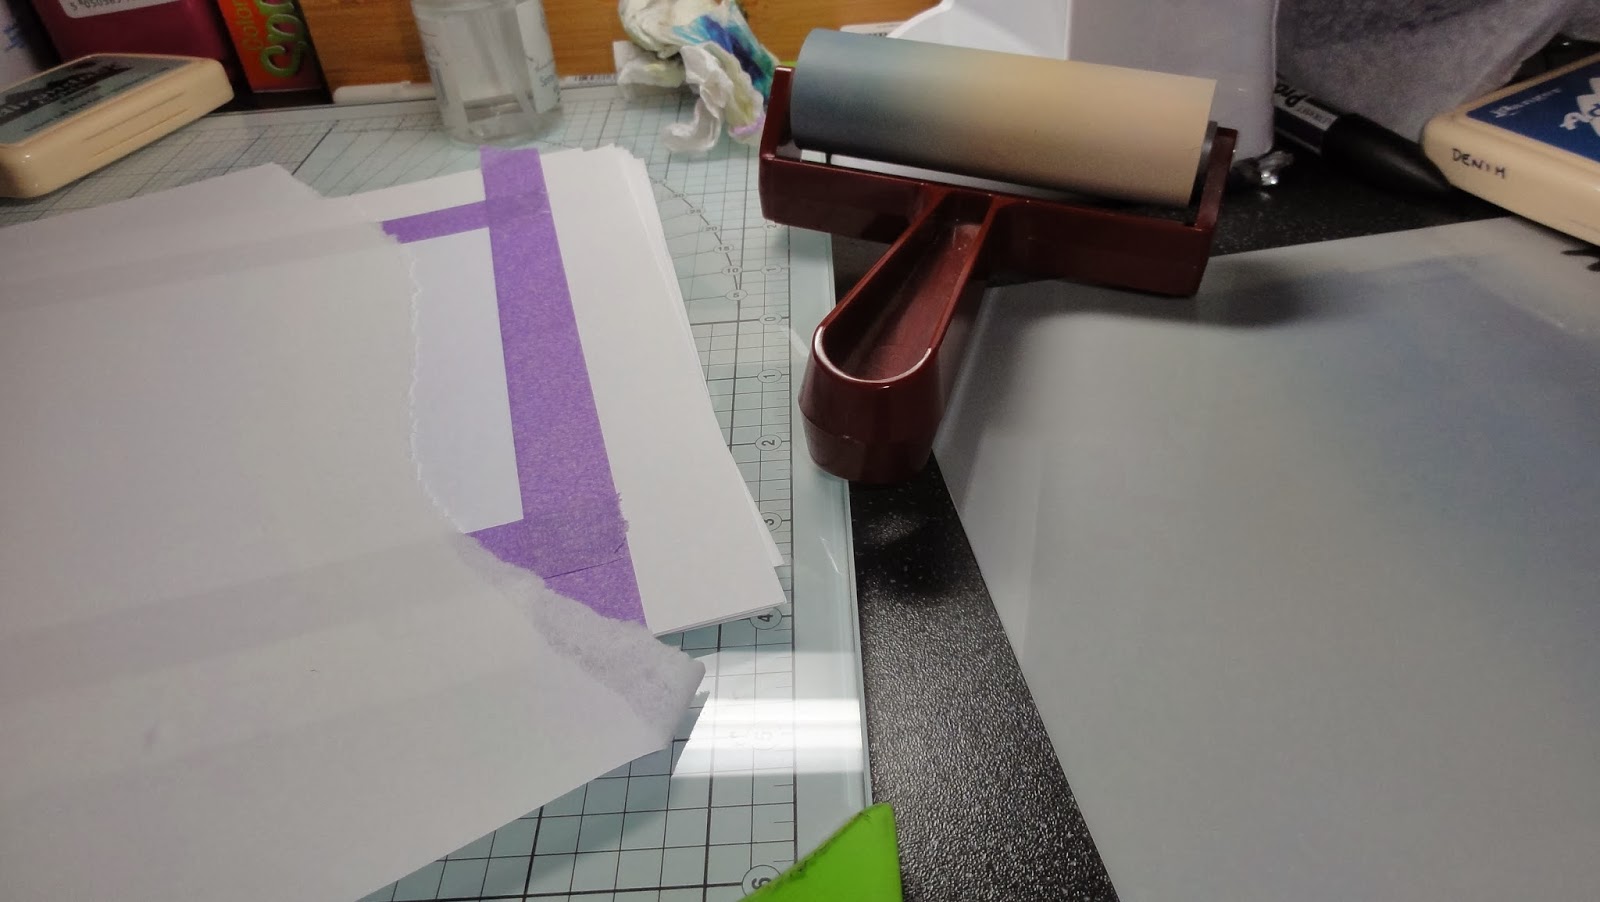
Using the Juniper, load your brayer and spread it on the Splodge mat, ensuring that what will be the leading edge of the brayer remains free of ink. Cover the whole piece of card with the Juniper, making sure that you lift the brayer after each pass across the card. That helps to avoid the dreaded stripes. return to the mat to reload the brayer, still keeping that leading edge clear of ink.
As you can see from this picture above, the Juniper is virtually invisible, but it provides a good base for the darker ink.
Then lay down the Denim ink on the mat by the side of the Juniper, load your brayer and start to bring it in from the top corner, reloading the brayer as you go, gradually darkening it as you go. Then turn the artwork round, ready to work in from the bottom. Using your brayer, work the edges of the Juniper and Denim inks together, still keeping that leading edge clean.
Holding your torn copy paper at the top of your first hill (remember that the darker one will be at the front of your picture, and the ones further back will be progressively lighter), start brayering in from the corner.

Move your piece of paper up the card to where you want your second and lighter hill, and repeat the exercise.

When you have finished your hills, remove the moon mask and put it away safely for another time.

Load your large foliage tree stamp with ink from what is left on the mat and stamp it at the base of your card

The small tree is treated the same but keeping it lighter in colour to help the perspective, and place it on another hill. Don't worry if you don't seem to have enough difference between them That can be sorted out later.
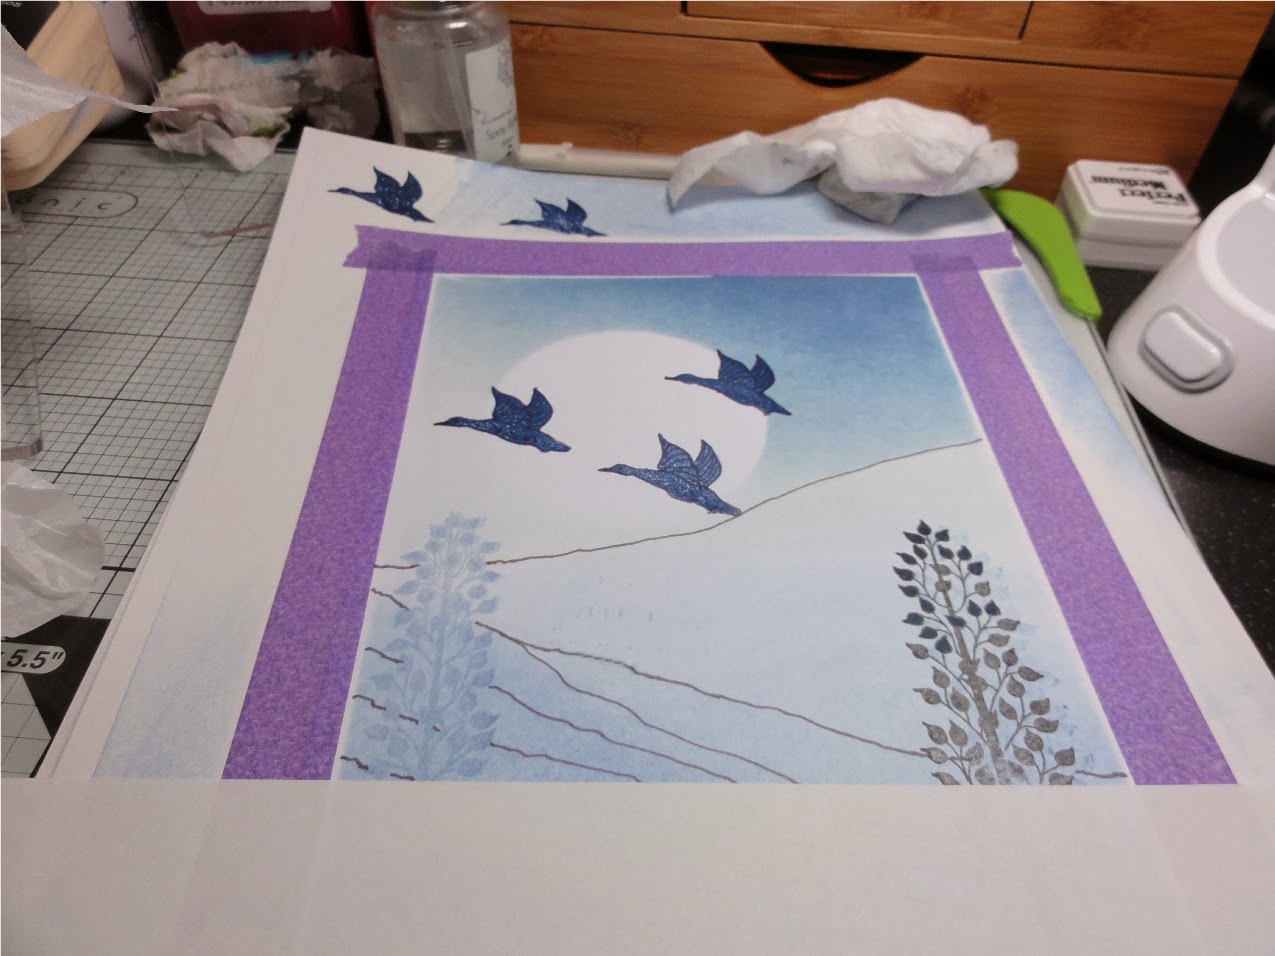
Then ink up the duck direct from the ink pad and stamp it where you feel it looks best. Barbara used the same duck but only one. However, I had a different type of card and a larger piece and I felt that mine needed the three ducks to give balance.
Both Barbara and I were not happy with our trees, so I followed her example and used a dark blue Promarker to tidy things up. I also felt I did not have enough definition between the hills, so again I followed Barbara's example of using furrows using a dark promarker.

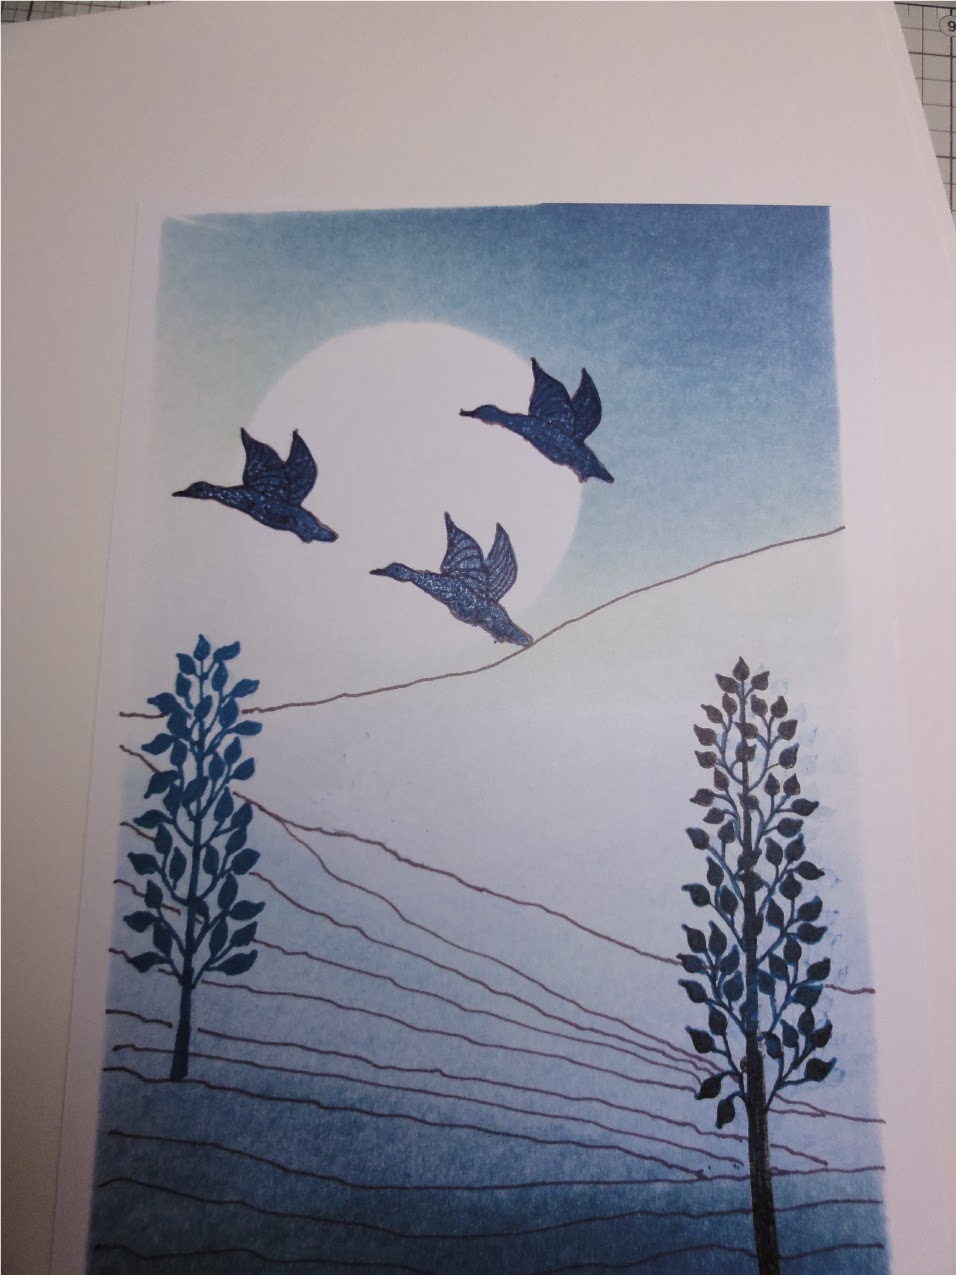
When you remove the masking tape, make sure that you pull it gently away from the centre of the card to avoid tearing your beautiful work. The final step was to trim the card right down to tidy it up, then mount it on another piece of Theuva card, then into a piece of dark blue pearlescent card.

There has been a lot of people recently stealing the designs of others. I am happy for anyone to copy what I have done, provided that they give credit to the original. In my case, I am giving the credit fairly and squarely to Barbara Gray and thank her very much for her brilliant designs and stamps and her willingness to share her tips and techniques. I hope you will take the time to follow the link and read her original post.
Even more do I hope that you will take the time to produce a real scenic card to enter into the Craft A Scene Challenge this month. Take care, though. This is my second attempt to do a card for this week. I had intended to do an urgently needed birthday card that would also fit the brief, and suddenly realised that my birthday card was fine, but did not fit the brief of making a scene. so that one was sent off and I started again with a tighter control over what I was doing to ensure I complied with the rules.
6 comments:
You did a wonderful job of it Margaret, its lovely.
Hey Margaret this is fab you have done a great job. Glad you posted a link on fb because now I have found you x
Such a pretty card and I love seeing the evolution of its creation!
wow...this is great to see how you made this fantastic,beautiful card.
I like this one very much.
regards,
Looks fab!
She has done some great step by step projects on her blog
Jackie 15
This is absolutely beautiful, you take so much care over your projects and it really shows!
Post a Comment